
Straighten images
Tilted images are the rule, not the exception. Problems like this are unlikely to have any relevance unless someone has a desire for their images to look professional. Obviously, that should include all dealers and those amateurs aspiring to sell more items on eBay.
Why are so many images tilted?
- no importance
- assumptions that borders are parallel to trimmed edges
- hard-to-use photo editors
- use of cameras

Canted image of a large bond from the
Ferrocarriles Nacionales de Mexico
Based on informal counts, approximately 35% to 40% of all railroad certificates offered on eBay are canted in some way. (I count all certificates with trapezoidal appearances as "tilted.")
There are so many free photo editors available on the web that we must assume professional appearances do not matter to many certificate sellers on eBay. Not meaning to defend anyone in particular, I quicky say that it IS harder to straighten images with almost every photo editor other than with Photoshop.
Still, why don't seller fix their images? Are they trying to sell for the least amount possible?
Many sellers (and I assume collectors) take photographs of their certificates and a large percentage end up tilted. But so do a substantial percentage of images produced by scanners.
Are aligned images important?
The number of tilted image on eBay suggest not. I TRY to straighten all images on this site because their presentations are important to me. If collectors browse professional dealer websites, they will rarely see a single tilted image. It would appear that professional dealers consider properly-aligned images to be highly important, also. And who is selling the most? Professional dealers. Hmmm.
What about certificate edges?
When we talk about stocks and bonds, we see that the edges of many are NOT parallel to borders. It was not until the later years of paper certificate production that edge trimming became more important to printing/engraving companies were able to trim edges of certificates parallel to borders.
When flipping through images of certificates, it becomes readily apparent that alignments were widely variable. This is understandable because certificates were printed one at a time throughout much of the period of certificate use. With the exception of early securities, stocks and bonds were usually printed with several separately-engraved plates or lithographic stones. Colored borders were normally printed first. If colored backs were required, they too were printed separately. Underprints were sometimes added and then came text, printed one or more days after earlier ink had dried. With all the potential plates used, It is common to see mis-alignment of different elements..
Many collectors who own scanners align their certificates with one edge touching the frame that normally surrounds at least two sides of the glass scanning surface. That sounds perfectly logical and reasonable until a certificate gets caught under a frame. A couple of those occurrences, often with torn certificates involved, and we gradually learn to scan in the middle of scanners and not along the edges.

Slightly tilted image of a stock certificate from the Western North Carolina Scenic Railroad as scanned on a letter-size scanner
Here is how a certificate looks when scanned away from the edges of a scanner.
So how do we get certificates aligned to horizontal of vertical?
- The easiest and fastest way is to rotate certificates after scanning with photo editing software.
- Aligning certificates during scanning is also possible but it takes more time.
Aligning images horizontally or vertically with software
So far, I have encountered three primary methods of aligning certificates with software.
- draw a measuring line along a border and the software will automatically orient that line to horizontal (or vertical)
- measure the angle of the border relative to horizontal (or vertical) in the photo editor and then tell the editor to rotate the image by that amount
- place a point on a border line and use that point as an "axle" around which to rotate the image
These methods work equally well with scanned and photographic images. Trapezoid-shapes photographs usually need re-shaping of three sides to make them appear rectangular. As long as there are no nasty shadows and exposure is okay, well-worked photographs can closely resemble scanned images.
I have two tutorials that can help you learn how to align certificates horizontally and vertically with photo editing software. See:
While the tutorials are tailored to Photoshop and GIMP, the procesess are similar in other photo editors.
Aligning images horizontally or vertically during scanning
There are also three ways to get approximately-aligned images directly out of scanners:
- Find the edge most parallel to a border and align it closely to one of the edges of the frame around more scanners.
- Look carefully at a certificate before placement and estimate how much to rotate before scanning.
- Make one of more guides that will fit along the edge of the scanner. The orient the certificate to the guide.
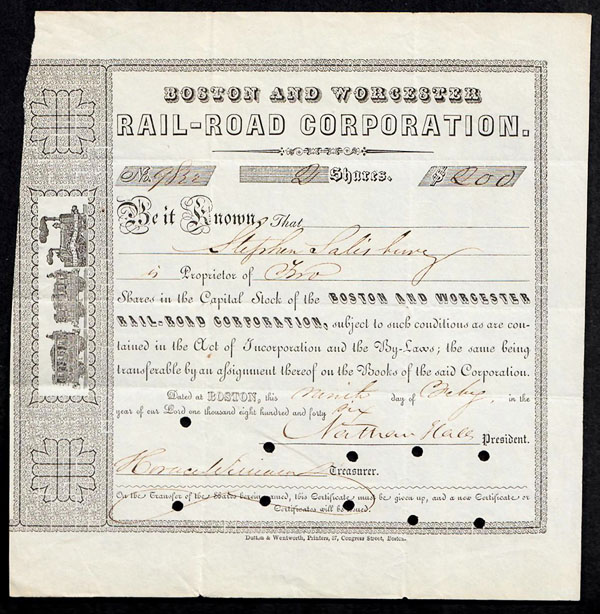
Shown below is an 1846 stock certificate from the Boston & Worcester Rail-Road Corp. It is highly typical of other certificates of the time in being produced on a letterset press with light gray paper. The edges of the certificate are quite straight, suggesting it was probably cut with a paper trimmer as opposed to scissors.
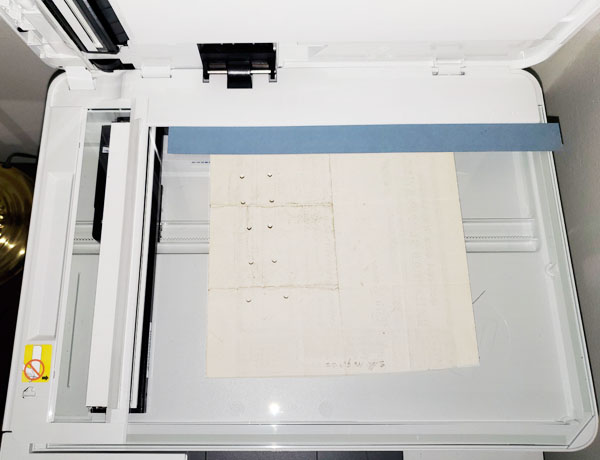
This method will work best with certificates printed on thin paper. We can see the border from the back, so this certificate will work. First , cut posterboard or thin sheets of balsa wood into strips approximately the length of the scanner glass. Cut them in quarter-inch increments from a half inch to 1.5 inches, taking care that the edges are parallel.
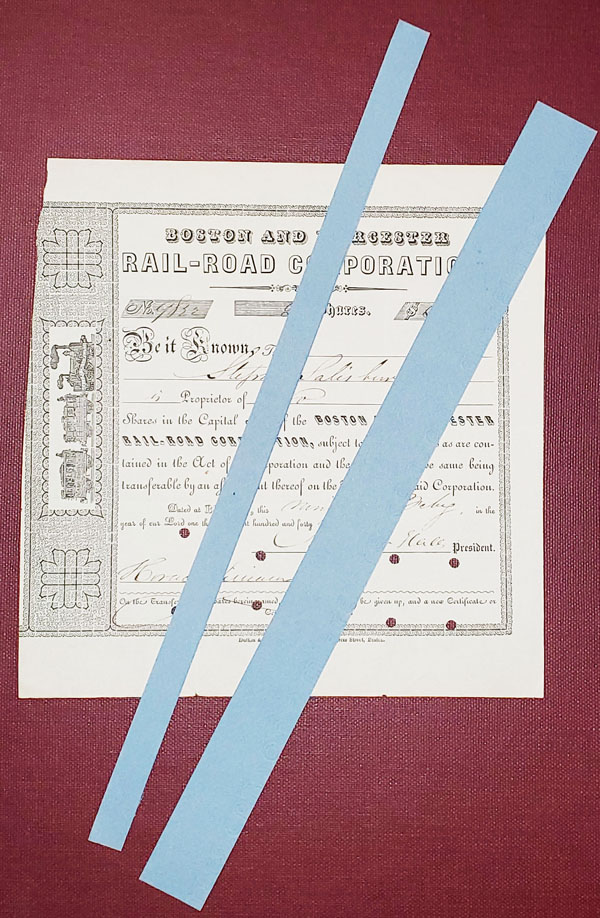
Lay a strip of appropriate width along the edge of the scanner frame and then slide the certificate under it until the certificate border "show-through" just touches the strip. Hold your finger down at that point and rotate the certificate until the border touches the strip all along its length. Shown is the certificate on an A4 size (8.5" x 11") Hewlitt-Packard laser jet printer/scanner with a non-removable cover, Once aligned to satisfaction, scan.
While the alignment will not be perfect, this is a quick-and-dirty way to get certificates adequately aligned to horizontal and vertical.